During spring break this year, I tried a new program aimed specifically for 8-12 year olds. We met each afternoon for two hours to work on creating paper automata. I had a limit of 25 participants, and required pre-registration in order to attend. Registration started out slow, and about the time I began to get concerned that I wouldn’t have enough registrants, all my slots filled up. The kids were as excited as I was to try out this new craft program.
We started out with fairly simple mechanisms, which could be completed in the two hour time frame. The first day, we built a Penny Bank Penguin, which flapped it’s wings when a coin is dropped through the coin slot. There are extensions of the wings inside the body under the coin slot. When a coin falls through, it hits the tabs and the wings tip up, then fall back down as the coin falls off the tabs and into the body.
Some of the parts toward the end were tricky, but I went from participant to participant, helping them throughout the project. I also suggested they they do some things in teams, which made the gluing and fitting a bit easier for each child. In the end, every one had a fairly functional penny bank (which actually worked better with quarters, which are heavier). Most folks decided to skip the final step, which would seal their bank completely, keeping them from being able to get their coins back out again. At the end of the day, they took their completed penguins home.
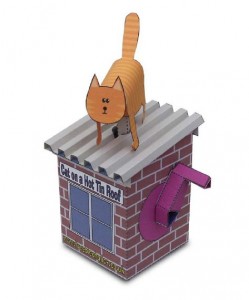
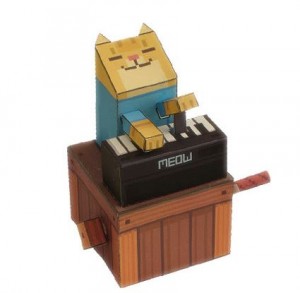
The second day, participants chose between two mechanisms containing cats:
Cat on a Hot Tin Roof Keyboard Cat
These automata were a bit more complicated, building on what participants had learned the day before. I was quite impressed when several people went on ahead of the group constructing their new paper toys. I took it to mean that I’d done a good job instructing them the day before, and that they were engaged and enjoying themselves. Some folks finished one of the two cat toys, and asked to take the other home to do on their own.
The last project we tackled was a marching robot. It was both larger and more complicated than the others. The robot is roughly a foot tall, and has several moving parts. As the crank is turned, he marches and moves his arms. It’s really amusing, and captures the attention of boys and girls, alike.
We spent the next two days working on the robot. It had a lot more pieces, and required precision, in order for it to work properly. In the end, though, everyone who started the robot had a working, marching robot.
Saturday, to celebrate their commitment and their achievements, we had a awards ceremony and pizza party. Each of the participants has already asked to have another automata workshop during their fall break next autumn. I’m looking forward to it, myself.
For those of you who are curious, I found quite a lot of patterns free online when I did a search for paper automata. I also bought a few kits and books from which to select the actual mechanisms that we would make in the workshop. Now I have plenty to choose from for the next, and hopefully, many more, such workshops. There are some great free downloadable patterns at Canon Creative Park, including some moving hot air balloons that I can’t wait to build myself. For the ambitious, there’s also Paperpino and the Rolling Reels Circus Rob Ives, who is famous for his paper automata, has his own website to which you can subscribe. There are some incredible mechanisms there, as well.


these were so adorable we tried to make the cat on the roof to see if this program was something we could duplicate with our tweens in a public library setting. The staff attempts led us to question if you pre-cut the pieces or allowed your attendees to use an exacto knife? Also which glue did you use that allowed for quick drying time?
thanks for a fun idea!! Kelaine @ EGR branch of Kent District Library, Michigan
I’m glad you liked the idea!
In answer to your first question, yes, all of the pieces were cut out ahead of time, both to save time, and to ensure that the pieces were cut accurately. I reserved the use of the X-Acto knives to myself and the parents who were helping. It took quite a bit of time to cut all the parts out, and we wouldn’t have been able to finish the projects in time if everyone cut out their parts themselves. Plus, I was concerned that participants may get discouraged or bored if they had to spend so much time preparing to get started on the fun part of the program. As for the glue, we used regular white school glue. A very thin film of glue, applied with a toothpick or q-tip, dries quickly and securely.