
How can kids use the scientific method to develop better, higher flying paper rockets, or, better yet, shock the administrators on the third floor? It’s easy!
For the last several years, I’ve been doing stomp rocket programs at my library. Whether it’s during summer reading club or in the middle of the school year, it always draws quite an good crowd. The pre-program preparation requires a fair amount of work, but it’s both fun and the results make it worth the effort involved. Each time I do the program, I add a bit more experimentation to the kids’ activities. This year, I’m planning to add several new levels of activities to the program.
But, to start off, I should explain what stomp rockets are. They are not the water-powered paper or plastic rockets many people think of when I say “stomp rockets.” The rockets I mean are literally powered by stomp energy – the air pressure created when participants stomp or jump on a 2 liter drink bottle attached to electrical tubing supporting the launch tube upon which rests a paper rocket.
The more force they create with their feet and/or weight, the higher the rocket will fly! That’s the part that involves physical exercise, and gets them very excited. Of course, there’s always the competitiveness, as well. Who will be the first one to land a rocket on the roof of the library?

(These are’t my pictures. I found them on-line. I’m always too involved in my programs to remember to take pictures, until it’s too late. I’ll try to replace these with some from my own program this time.)
Well before the program, I build several rocket launchers. Right now I have four or five. Each time I build one, I tweak the design a bit, so each of my launchers looks a bit different. This year, I’m planning to build a double rocket launcher similar to the one in the photo above, and another which will use aquarium type tubing instead of the electrical piping. I’m also going to use bottles of various sizes this year, to allow the participants to see the difference bottle size/ volume of air will make in the rocket launch and flight.
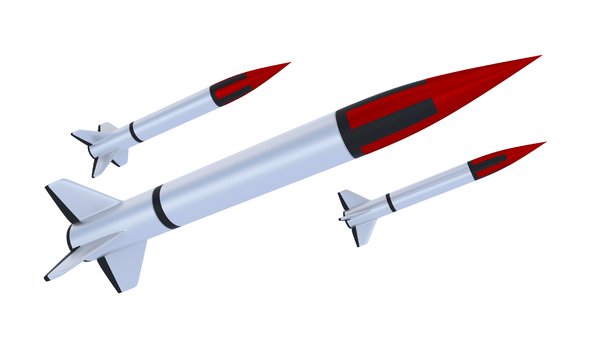
I also build as many rockets as I can before the program. When there’s a large crowd of excited kids and parents, the rockets have short lifespans. And some will disappear on the roof, never to be seen again. My rockets will vary in size and design, from very simple to rather complex, and from very light to rather heavy. Some even look like real rockets. I get those patterns from various sites on-line.
The heaviest rockets are usually the most durable. They are also the simplest in design. Usually 12-16 inches in height, they are made from 2-3 pages of newsprint rolled into a tube, taped securely, then covered in a layer of duct tape. The fins are made of cardboard from cereal boxes. Other rockets are made from printed patterns on paper that’s a bit heavier than standard printer paper. I also use a light cardstock. The cardstock is saved for the rockets that are fancy, and the ones that are replicas of real spacecraft. The patterns for these are also located online.
To begin the program, I ask questions about gravity. We discuss the force that holds things on the Earth, and what it takes to escape that force in order to travel into space. Sometimes we even have a contest to see who in the group can jump the highest. I try to have models or pictures of various rocket designs from history to show how there can be different answers to the question, “How can one design a craft to escape Earth’s gravity?” We also discuss what all the rockets have in common.
Once everyone has an idea about what a rocket needs in order to fly, I give everyone a flexible straw, some printer paper, pencils to draw a design, markers to decorate their designs, scissors, and tape. With younger crowds, I’ll have a design already available for them to decorate and color. When their rockets are decorated and cut out, they wrap the paper around a pencil to form a tube, and tape the tube to keep it from unrolling. Then they can attach fins to the bottom of the rocket, and slide it off of the pencil. When the top has been folded over and taped securely closed, they are ready to slide their rockets onto the short end of the flexible straw, and launch it by blowing in the long end. These are safe rockets to fly indoors. They can experiment with different numbers of fins in different places on the rockets to see how the flying ability of the rockets is affected.


Once they have a basic understanding about how rockets work, and they have their own rocket launcher to take home with them (the straw and tiny paper rockets), they are ready to go out into the courtyard to get busy with the real fun! We go outside and I show them how the stomp rocket launchers work. Then they divide into groups according to the number of launchers I have and line up behind the drink bottles. The first person in each line takes a turn jumping/stomping on the bottle to launch the rocket already in place on the launch tube. The launcher then retrieves the rocket, blows into the launch tube to re-inflate the bottle, and slides the rocket onto the tube for the next person in line. We keep playing with the rocket launchers as long as the participants want. They can swap groups, launchers, and rockets as often as they want. There are rockets with three fins and rockets with four fins. As fins get damaged or knocked off, we experiment with no fins, one fin, and more than four fins. I always have plenty of extras and tape for quick repairs.
Here are some of the sites I use to get patterns for the stomp rocket patterns:
Pack 165 Stomp Rocket Plans and Instructions
Hurlburt Airforce Association Educator Workshop
Make Magazine’s Rocket Launcher Instructions
And for paper models of real spacecraft, as well as a few stomp rockets, this site is fantastic:
Lower Hudson Valley E-Gift Shop (The models are free to print.)
Ecard Paper Models (This one has a free stomp rocket that’s very colorful.)
Have a great time stomping!!


Leave A Comment