Leading up to the holidays, people are often busy buying gifts and decorating their homes. So, this year, I decided to offer different decorative crafts each week in December. One of the most popular was the paper spheres. The craft is simple to do, and only requires strips of paper, a hole punch, and brads (or bent paper clips) to complete. Being simple in its execution allows for crafters to put their focus on creativity and originality. They can also make more at home themselves, or as a family activity of they so choose, with a short list of easy to find supplies.
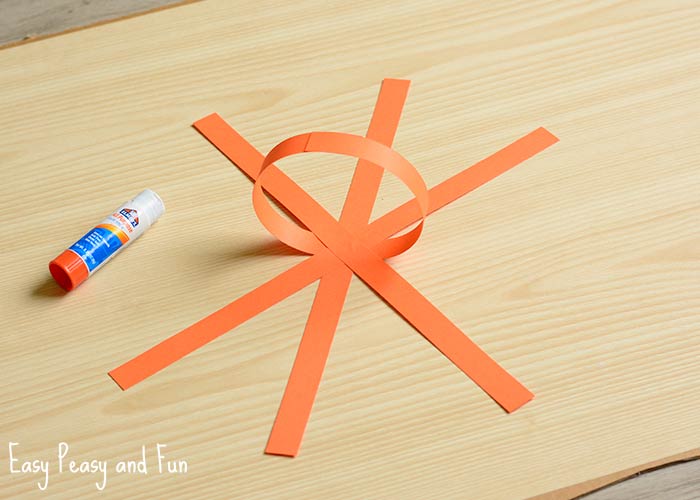
To start off, I provided strips of construction paper and brads. I had cut sheets of every color available to me into 1″ strips 11″ long. Participants chose 9-10 strips and decorated them with crayons, markers, and/or stickers. Then they used the hole punch to poke holes in each end of each strip. One brad is used to attach all the strips at one end, then the strips are divided in half and twisted around so that they lie flat in a much longer strip with the brad in the middle. Alternating ends are curled around to line up at the holes, and the other brad is inserted though all the holes with the bottom side pointing toward the first brad. At this point the paper has formed a large circle. Each strip is then slid apart from its neighbors until all the strips are separated and it has formed a sphere. Confused? That’s what pictures are for…


Here are two pictures showing two different techniques for attaching the strips. One is showing the method I use. The other is using a gluestick to attach the trips of paper. When the paper strips are curved around and the second brad is inserted pointing toward its partner, the points that separate to hold the brad in place will be on the inside of the ball.
Here’s a YouTube video of a fancier version of the globe ornaments. Sequins and beads have been added, and a piece of straw is used to help it hold its shape.
Scrapbook card and other decorative paper can be used to create some very pretty and seasonal baubles.


After participants finished their first bauble, they were free to experiment with different lengths of paper and different numbers of strips. I also encouraged them to try cutting their strips across the sheet of paper instead of lengthwise. They discovered that the paper strips were “floppier” cut one way than cut the other. They also learned how the length of the paper strips effects the “roundness” of the decorations – shorter strips made short, fat shapes, while longer strips yielded elongated shapes. We also made small balls that we attached inside of larger ones, to create double baubles. That was a bit more complicated, but a lot of fun.
While researching what other crafters have done, I discovered that some very creative people have used this same craft in a multitude of ways that made it a fun craft any time of the year. For example:


I’ve also used this technique to create jack-o-lanterns and other round fruit.


Leave A Comment