Eyes are fascinating things, and the variety of types of eyes and the ways they see makes for interesting programming. I recently created a new school outreach program called Seeing is Believing, which addresses some of the basics of types of eyes and how they see. This 50-minute outreach visit is different from ordinary library programs, addresses some interesting STEM concepts, and is challenging and fun for the students!
I start with a book or two, depending upon the age of the class. I have presented this program for classes ranging from Kindergarten to 5th grade, with the level of activities adjusted accordingly. Two books I particularly like for this program are Whose Eye Am I? by Shelley Rotner, and Eye to Eye: How Animals See the World, by Steve Jenkins.
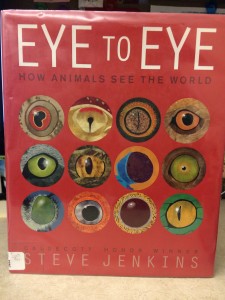 The book Eye to Eye… discusses the four types of eyes: eyespots, pinhole eyes, compound eyes, and camera eyes; with each there is an animal given as an example. The information given in this book includes such facts as the biggest eyes, the most eyes, some of the weirdest eyes, and other interesting animal eye characteristics. Large, colorful illustrations and text that can be easily adapted to audience age contribute to its usefulness and interest. A one-page chart of the “evolution of the eye” and a page of animal facts for the 24 different animal eyes included, along with a glossary and a brief bibliography, make this a useful book for further exploration as well.
The second title, Whose Eye Am I?, is perhaps a little better suited to the younger grades. While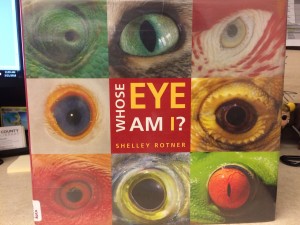 it does include a fair amount of interesting text, it can be adapted by using only the basic facts and the guessing game for each different animal and its eyes. There are up-close, full-page, full-color photographs of different animals’ eyes, followed by information and a photo of the animal in full on the next page. The design lends itself to having the class guess Who Am I? for each pictured eye, before turning the page to discover whether they guessed correctly. Smaller photos and minimal information is included about a variety of other animals and their eyes, along with the full-page photos for guessing. A total of 27 different animals, plus humans, are included in this book. The two-page spread at the end of Whose Eye Am I? about human eyes and how they see, along with a glossary, make a good segue into the activities.
For the upper grades, students create paper models of the human eye and study how it works, based on this Mystery Science experiment:
https://mysteryscience.com/body/mystery-2/eyes-vision/60?r=18829553
We color, cut out, and put together the paper model of the eye, and then use a credit-card sized 3X magnifying sheet (available from Amazon, https://www.amazon.com/OpticLens-Credit-Magnifying-Lenses-Wholesale/dp/B00C3VQ8VY/ref=sr_1_5?ie=UTF8&qid=1521646579&sr=8-5&keywords=3x+magnifier+credit+card) slid into the model to give the eye a lens. (A small, hand-held regular magnifying glass will work, but is awkward.) By holding the model eye parallel to a window and perpendicular to the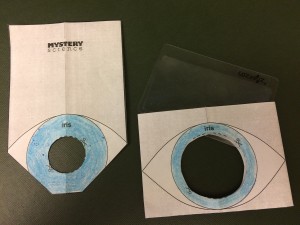 human eye, with a blank white index card held behind it, the light from the window will form an image on the card through the “lens” of the eye. (See the activity instructions from Mystery Science for more explanation.) Students can then learn about focal length; discuss why the image is upside down on the card; and figure out why just an eyeball won’t actually be able to “see” anything without the brain to interpret the image. With the removal or addition of the second iris card, the discussion about how our eyes narrow or widen to allow more light can be facilitated. While this particular activity is difficult for the younger students to recreate, a simple experiment using pairs of students to act as “eyes” and “watchers” will allow them to see how the pupil of the eye expands and dilates with the amount of light available.
For each pair of students, designate an “eye” and a “watcher.” Have the “eyes” look toward the lights in the room with their eyes closed. Instruct the “watchers” to carefully watch the eyes of their partners. As you count to three, have the “eyes” open their eyes to briefly look at the lights then look quickly back at their partners. If the “watchers” are looking closely, they should be able to see their partners’ pupils adjusting. After several rounds, have the “watchers” and “eyes” switch roles and repeat the exercise. We also talk a little about the reflective coating at the back of some animals’ eyes- notably cats, cows, and deer- which allow them to see better in the dark; and which give the “laser eye” look of those animals in low light conditions.
Following this, I have a variety of gadgets which can be used to approximate some of the different ways that various 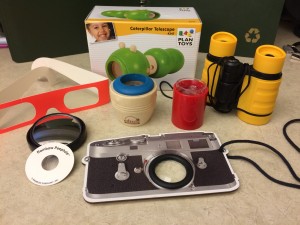 animals see the world around them. I simply hand out the tools, give them a few minutes to experiment, then note that it is time to switch tools. This works well with the students standing in a circle, or by setting a variety of tools on a table then switching the tools from one table to another. With a little bit of initial expenditure, I have tools that can be used again and again, either for an in-library program, or in a packaged and ready-to-go outreach kit. All I need to add to take the program to a school is the printed eye model pages.
The tools I have included in my kit are available from Amazon.com here:
Toy telescope:
https://www.amazon.com/Planactivity-Caterpillar-Telescope-Discovery-PlanToys/dp/B00N6F4L2E/ref=sr_1_cc_1?s=aps&ie=UTF8&qid=1521648045&sr=1-1-catcorr&keywords=plan+toys+telescope
Toy binoculars:
Magic Bee Eye (faceted lenses):
Convex mirror:
Bug eye lenses:
Rainbow peephole:
The “camera” card with the multi-faceted lens in my photo was purchased at a museum store years ago. I’m not sure if something similar is still available.
If you intend to duplicate this program, I would suggest that you first make one of the paper eye models yourself, to be sure you fully understand the instructions. The video is clear, but anticipating the problems your students may have in recreating it may be helpful. Even for the 5th grade classes, the eye model took longer to create than I expected. Simply explaining what they needed to cut out and what they needed to fold was a bit of a challenge. It is also worth noting that the first day I did this program, the weather was grey and overcast, meaning that the light from the classroom windows was not bright enough to make easy-to-see, super-clear images on the cards through the eye models. It worked well enough to make the point, but would work much better in a high-light, bright-sun situation! Also worth noting is that if the windows do not face any noticeable objects, it’s difficult to determine if the students are creating clear images or not. The second-floor windows we used did not face near-by trees or buildings, making determining what we were “seeing” through our models additionally difficult. There are probably ways to approximate this part of the experiment with bright indoor light sources, but I did not try to do that in the school library, where I was presenting the program.
For additional information, related video, and activities, Mystery Science has this to offer as well:
https://mysteryscience.com/body/mystery-3/how-eyes-work/61?r=18829553
Seeing IS Believing!


