After a fall visit to the Field Museum, my colleague and I were inspired to share knowledge from the museum’s extensive Specimens exhibit. We were particularly struck by the information about the Tully Monster, a prehistoric water animal whose fossils are abundantly found in Illinois, not too far from Skokie Public Library. We decided to focus on two main concepts for a Be the Scientist Program for grades 3-5: what are fossils and how do scientists determine what animals look like from them. Here’s what we did.
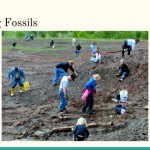 We began the program with a brief slide presentation with background information about fossils. Participants were asked what they knew about fossils and were encouraged to share and discuss before the presentation showed a definition from the Field Museum. Then we used a small fossil kit from the library’s STEAM kit collection to look at different types of fossils like teeth, bone, and imprints. From there, we focused the content on Illinois and shared information about Mazon Creek, an area south of Chicago rich with Tully Monster and other prehistoric fossils. Using a photo from a Mazon Creek collection site, we used this as an opportunity for discussion about how fossils are collected, what tools or gear are needed, why fossil collection is important, and how Citizen Science can help advance understanding of life on Earth.
The slide presentation also included a photo of a hammerhead shark’s jaw modeled out of the modeling clay and toothpicks. This was used as an example of one way scientists could visualize animals based on found fossils. We also talked about other technology that could be helpful, including 3D scanning and printing. And that led us to the hands-on portion of the program.
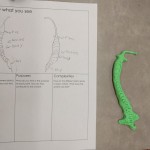 Participants were challenged to create a 3D model of the Tully Monster using photographs of fossils, Play-Doh, and toothpicks. We encouraged participants to start with a drawing of the model using a worksheet we designed that helps identify parts and purposes of what you are seeing. If participants were not keen to draw, we encouraged them to write down observed characteristics of the animal, which would then help them with their 3D model.
We allotted 15 minutes for the 3D modeling activity, where Play-Doh was passed out right before the time started. Participants were encouraged to work in teams at their tables but could also work independently if they preferred. Each participant received two small containers of Play-Doh and were offered toothpicks as well as a cutting tool. About half the group were able to begin modeling their interpretation of the Tully Monster without question. The other half required more explanation of what a 3D model was. We used our bodies to help explain this, where we felt our heads and verified we were not flat like the book character, Flat Stanley. This helped participants rework their Play-Doh to be more rounded and full instead of flat against the table.
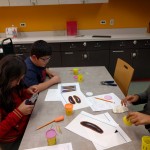 After the 15 minutes were up, we regrouped and talked about the modeling experience, what was/was not challenging about it, and then shared observations about the different parts or characteristics of the Tully Monster we could recognize from the fossil images. Then we revealed the Field Museum’s interpretation of the Tully Monster and continued the discussion about where we went wrong in our visualizations. (The most common error was mistaking eyes for arms!)
The program concluded with a question from one of the participants: what led to the Tully Monster’s extinction? We decided to make that an extended challenge, where participants hypothesized out loud as they left but then were encouraged to research the answer and come back to tell us. We’re still waiting but are hopeful that by next month’s Be the Scientist, we’ll know the true story of the Tully Monster.


Leave A Comment